Showing posts with label bread. Show all posts

Friday, April 6, 2012

Dairy Free Chocolate & Halvah Babka (Breaded Twist)

Recipe/ Chocolate & Halvah Babka (Breaded Twist)
Dietary Consideration/ Dairy Free (and tasty!)

Wow. and wow again! When I was in high school I used to work at a bakery that made these and wow were they amazing... chocolate or apple... fresh from the oven. After a while I knew it was time to quit... until I stumbled upon a bakery in Israel that has a similar yet even more heavenly than I remembered, version. So naturally I had to eat everything! And then decided to take a go myself, and here is what happened... I know they look pretty intimidating but they were surprisingly easy and oh so worth it! See below for the recipe and slideshow below for step by step on how to roll up your babka!


Chocolate & Halvah Babka (Breaded Twist)
Makes 2 free-form cakes, or 2 loaves using long loaf pans ((12 by 4.5 inch, measured at the top)

Ingredients/
6 cups all-purpose flour
2 packets (0.5 oz. /14 grams) active dry yeast
1 cup sugar
3 eggs, room temperature
1- 1/3 cup lukewarm milk (about 100 F)
1 teaspoon salt
1 teaspoon vanilla extract
1 lemon, zested
14 tablespoons unsalted butter, room temperature, diced
1 egg, lightly beaten, for glaze

Filling/
1-2 cups chocolate spread, use as much as you like
½ lb. halva, crumbled
A handful chocolate chips/chunks

Directions/
In a mixer bowl fitted with a dough hook, put all the dough ingredients besides the butter, and mix for 5 minutes. Add the butter gradually until it is fully incorporated. Kneed about 3-5 minutes longer until dough is smooth and soft.

Wrap the bowl with plastic wrap and refrigerate overnight.

The next day, divide the dough into two equal parts. Roll each part into a rectangle, about ¼-inch thick. Spread generously with chocolate spread and the rest of the ingredients you are using as filling. Be generous as you like. (See photos).

Roll dough up (see slideshow below). Cut lengthwise into two long strips and then turn them one over the other/twist, like a braid. Repeat with second portion of dough. Place each cake in a well greased loaf pan (line the pans with parchment paper), or free-form on a baking sheet lined with parchment paper with enough space between them.

Cover loosely with clean towel and place in a warm spot. Let cakes rise about 45-60 minutes until they double in volume.

Meanwhile, preheat oven to 350 F degrees. Brush cakes with the beaten egg. Bake for 40-45 minutes, or until cakes are nicely browned. Remove from oven and let cool. Remove from the pan and cool on a rack.

Wednesday, September 28, 2011

Market Recipe/ Apple Everything... (Gluten Free & Vegan)

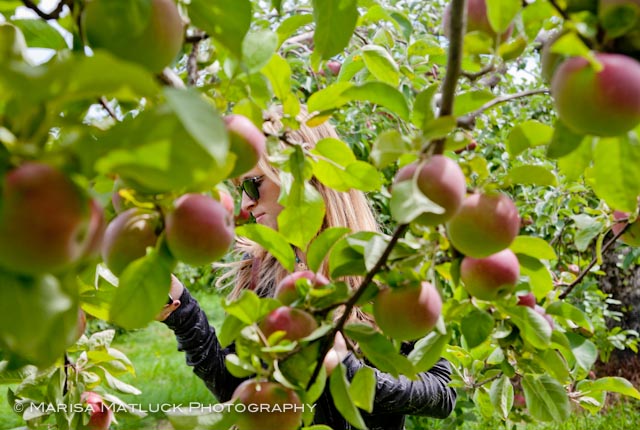
That phrase was probably the most important phrase I learnt while cooking over the years. The last little scrape out of the bowl could yield you at least 1 more cookie instead of sending it down the drain with the rest of the scraps. A few weeks ago me and my best friend who is a awesome travel buddy/designer/photographer, decided to head up north to Portland Maine for a photographic and culinary adventure. Now who goes up to north country in the early fall without stopping at at least 1 apple orchard... If not two!?

We naturally went apple picking and when we arrived back in NYC we made a plethora of apple goodies... the main goal (aside from EATING) was to not waste a single part of the apple except for maybe the stem... She clicked away while I peeled, chopped and preped.

Our apple menu consisted of/
A German apple pancake (recipe on Marisa's blog)
Apple Cobbler
Apple Juice
Apple Sauce (see recipe below)
& Apple Pecan Bread

Now you ask how we didn't waste anything aye? Well even the peels we threw in the trusty 'ole vita prep and minced those suckers to juice and used it in place of water in a bread recipe.

Click here to be directed to Marisa Matluck Photography website for the German apple pancake recipe and more photographs from our apple picking adventure. Enjoy and wishing you all a sweet new year! (recipe below pictures)

photography by Marisa Matluck Photography

Spiced Slow Cooker Applesauce
Yield 8 servings

Ingredients/
8 apples - peeled, cored, and thinly sliced
1/2 cup water (I used apple wine I bought last harvest near Bethlehem PA)
3/4 cup packed brown sugar
1/2 teaspoon pumpkin pie spice

Directions/
Combine all ingredients in a slow cooker; cook on Low for 6 to 8 hours. ENJOY!

Nutrition/ Calories: 150 | Total Fat: 0.2g | Cholesterol: 0mg

Sunday, August 21, 2011

Challah (Bread) Making Lessons

A few weeks ago at Camp Seneca Lake (Honesdale, PA) I instructed a Challah making class which went over great! Everyone had varied ideas for shapes, flavors and toppings - and of course all were delicious! I wish I had "after" shots to show you but as you can imagine, 40 girls waiting for their fresh baked bread doesn't leave too much of a "photo opportunity"! Thank you Gabe for the fantastic photos!


Thursday, March 24, 2011

Rye Bread Humor...

So I found this joke online... its a bit dirty but I couldnt help myself! since my dad has the most perverted sense of humor I figured this joke was perfect! My parents came in for the weekend to visit me at my apartment in NYC so for breakfast I surprised them with a family favorite... rye bread, smoked salmon and scallion cream cheese... Could we be any more Jewish?? Here goes... Enjoy!

Two old guys, one 80 and one 87, were sitting on their usual park bench one morning.
The 87 year old had just finished his morning jog and wasn't even short of breath.
The 80 year old was amazed at his friend's stamina and asked him what he did to have so much energy.
The 87 year old said, 'Well, I eat rye bread every day. It keeps your energy level high and you'll have great stamina with the ladies.'
So, on the way home, the 80 year old stops at the bakery. As he was looking around, the lady asked if he needed any help. He said, 'Do you have any rye bread?'
She said, 'Yes, there's a whole shelf of it. Would you like some?'
He said, 'I want 5 loaves.'
She said, 'My goodness, 5 loaves... by the time you get to the 5th loaf, it'll be hard.'
He replied, 'I can't believe it, everybody in the world knows about this shit but me.'


(Rye bread recipe from Jim Lahey's Bread) 


Saturday, February 26, 2011

Who Says Cheeseless Pizza Isn't Good!?

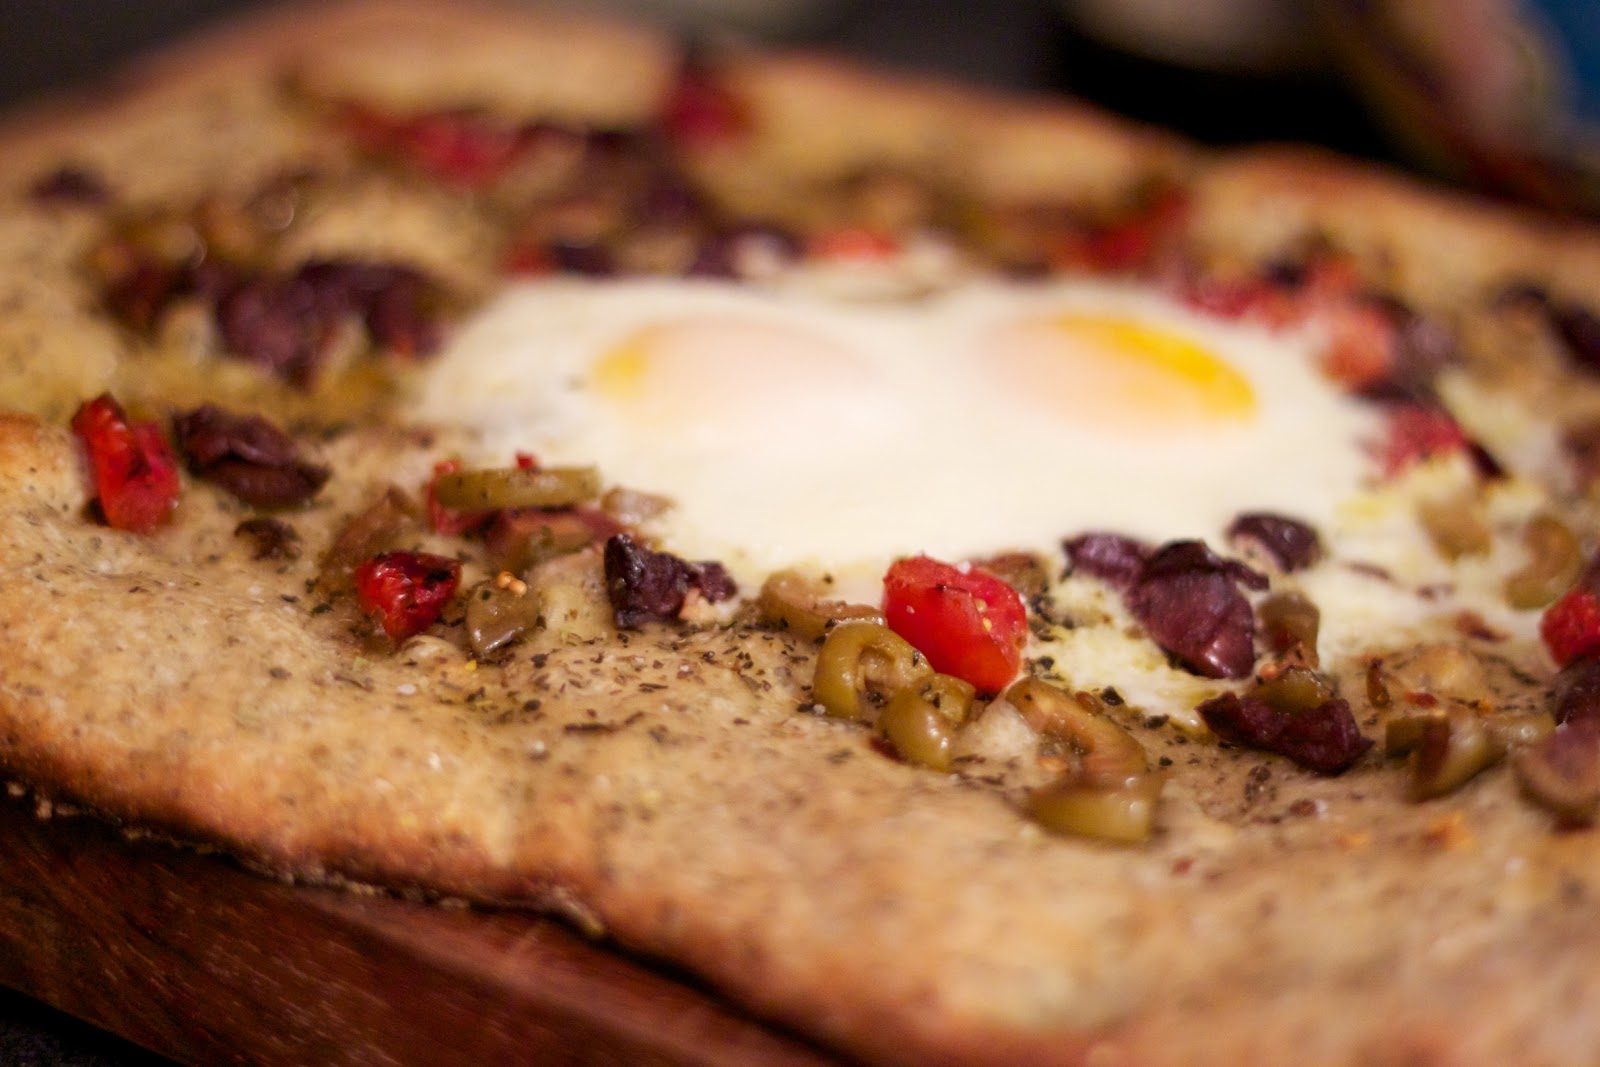
Anyone who knows me... (or pays attention - my Dad never remembers!) knows that I am allergic to dairy, which would explain all of the dietary restrictions that I cater to*. So I cover my pizzas with veggies, herbs and eggs, and with the right combo I don't even miss the cheese. I had some friends over the other day in the midst of my bread phase so I made a herb and olive oil filled whole wheat pizza dough (see below for the recipe), then covered it with Greek marinated olives, roasted red peppers, garlic, salt, pepper and 2 farm fresh eggs. Now I know a lot of you cringe at the thought of an egg on a pizza but until you try it you cannot say anything because it happens to be phenomenal! Truthfully, ANYTHING with a runny egg on it is fantastic! All the cool kids are doing it! If you would like to try it and some other great pizzas without the hassle of making them, try OTTO Pizzeria in NYC. The Mario Batalli hot spot on 8th street between 5th ave and University Place has some great pizza and pasta selections... covered with runny yolks :D One of my favorites - Enjoy!

*If you are curious about the allergy, I wasn't always allergic to dairy actually! I lived in Florence for 4 months and while I was there I ate my lifetime supply of dairy products! So much so that I gained a solid 60lbs. Anywhoo... when I returned to Boston and took off the stretchy pants I wore for the past 4 months- I realized that NOTHING ELSE FIT ME! I immediately went on a diet and cut out meats and high fat dairy. I lost the weight pretty fast but when I tried to go back to dairy my body completely rejected it... and here I am today LOVING CHEESE-LESS PIZZA! But truth be told I have eaten my fair share of dairy for a lifetime... AND THEN SOME!


No-Knead Pizza Dough
Adapted from Jim Lahey, BREAD
Makes four 12-inch pizza crusts

Ingredients/
1.5 cups bread flour, more for dusting
1.5 cups whole wheat  flour
¼ teaspoon instant yeast
2 teaspoons salt
1½ cups water
3 tablespoons of mixed herbs (fresh or dried)

Directions/
In a large bowl, mix the flour with the yeast and salt. Add the water and stir until blended (the dough will be very sticky). Cover the bowl with a towel and let rest for 12 to 24 hours in a warm spot, about 70°.
Place the dough on a lightly floured work surface and lightly sprinkle the top with flour and semolina. Fold the dough over on itself once or twice, cover loosely with a towel and let rest for 15 minutes.
Divide the dough into 4 pieces and shape each piece into a ball. Generously sprinkle a clean cotton towel with flour and cover the dough balls with it. Let the dough rise for 2 hours.
Stretch or toss the dough into the desired shape, cover with toppings and bake on top of a very hot pizza stone. (450˚F for 12-15 minutes) NOTE: if using eggs, add them halfway through cooking so they stay runny)

Thursday, February 24, 2011

Homemade Italian Stecca Recipe

Ok so here is my thrid attempt at bread... the second was this morning with a walnut raisin loaf that before I could even snap a few shots I smothered it with peanut butter and bananas and downed the whole thing (don't worry I had some help!) Below are images of Italian Stecca which I'm told means "stick" rightfully so I guess. Anyway, doesn't matter what they are called because they are addictive and amazing! I had one a few weeks ago at a friends place, and I couldn't get enough of them then so why stop now I say!? (extremely easy recipe below - all you need is time!)


Stecca Recipe
(Adapted from) Jim Lahey of Sullivan Street Bakery
Thanks Steamy Kitchen for typing the recipe!

1.5 cups bread flour
1.5 cups whole wehat flour flour
1 teaspoon table salt
1 teaspoon sugar
1/4 teaspoon instant or other active dry yeast
1 1/2 cups cool 55-65F water
additional flour for dusting
20 pieces of the any combination of following: olives, sundried tomatoes and roasted red peppers
1/4 cup extra virgin olive oil
3/4 teaspoon coarse sea salt or kosher salt

1. In a medium bowl, stir together the flour, table salt, sugar and yeast. Add the water and, using a wooden spoon, mix until you have a wet, sticky dough, about 30 seconds. Cover the bowl and let sit at room temperature until the surface is dotted with bubbles and the dough is more than doubled in size, 10 to 18 hours (24 hours if you have a cold cold home.)

2.  When the first rise is complete, generously dust a work surface with flour. Use a bowl scraper or rubber spatula to scrape the dough out of the bowl in one piece. Fold the dough over itself to her three times and gently shape it into a somewhat flattened ball. Brush the surface of the dough with some of the olive oil and sprinkle with 1/4 teaspoon of the coarse salt (which will gradually dissolve on the surface).

3.  Grab a large bowl (large enough to hold the dough when it doubles in size. you could also use a large pot) and brush the insides of the bowl with olive oil. Gently place the dough, seam side down into the bowl. Cover bowl with a towel. Place in a warm draft free spot to rise for 1 to 2 hours. The dough is ready when it is almost doubled. If you gently poke it with your finger, it should hold the impression. If it springs back, let it rise for another 15 minutes.

4. Half an hour before the end of the second rise, pre-heat the oven to 500F, with a rack in the center. Oil a 13″ x 18″ x 1″ baking sheet.

5.  Cut the dough into quarters. Gently stretch each piece evenly into a long, thin, baguette shape approximately the length of the pan. Place on the pan, leaving about 1 inch between the loaves. Embed the garlic cloves, olives or cherry tomatoes into the loaves, about five pieces per loaf. Drizzle, tab or brush olive oil on each loaf. Sprinkle sea salt or kosher salt over each loaf, remember to go light on the olive loaf since the olives are salty.

6. Bake For 15 to 25 minutes, until the crust is golden brown. Cool on a pan for five minutes, then use a spatula to transfer the baguette to a rack to cool thoroughly.

ENJOY!

Sunday, February 13, 2011

Nothin Says I Love You like Fresh Baked Bread

DISCLAIMER: If you are gluten intolerant you may as well just stop reading right now because what you are about to see might just be too painful!

Aside from the weekly Challah and the occasional pizza party, this was really my first attempt at bread baking. Funny because I am a baker, but I don't sell bread. Therefore, most of my days are filled with cakes, cookies and the like... but not anymore! Don't get me wrong, most of my meals involve a baguette or three, just not homemade- UNTIL NOW! Recently someone very dear to me showed me the light (and this book). Each recipe in this book is more mouth watering than the next and I have been privileged enough to try a few of them. Today I went with a simple whole wheat loaf just to get my juices flowin... "what should I make next" -she asks as she gains 20lbs.

I will also have you know that as I sit and write this post I am eating one of those PBJ slices now and may have dripped a bit on my keyboard... but I don't care! Cause alls good in the world with my bread scented apartment and belly full o' love. Enjoy & Happy Heart Day!

Wednesday, December 1, 2010

A Napkin Ring... THAT YOU CAN EAT!

So I posted a few of my family's Thanksgiving photos on Facebook earlier this week and I got several questions about the napkin rings that I used for my table setting... They are in fact edible and quite simple to boot! I was a bit brave and made some pizza dough but you can go the much simpler route and buy a bag of pizza dough at any grocery store. Cut the dough ball into 12 equal balls and roll out strands. Pinch together the ends of the strands and bake for 15 minutes at 400˚F or until golden brown. You can even doll em up with some cinnamon and sugar for a dessert party! Just make sure that the hole you create is big enough for the napkin to slide through we cooled. These can be made up to a day ahead and kept in a ziplock or an air tight bag. Enjoy and Happy Holidays!! Click here for Questions!


Related Posts Plugin for WordPress, Blogger...